Marketing Reports
Use the Call Back report to contact potential customers to thank them for coming to the shop to have an estimate written. It is important that this followup be done daily, because statistics show that customers decide within 48 hours where their vehicle will be repaired.
The Call Back marketing report is accessed from the Reports menu, on the Marketing tab.
Additional marketing analysis reports are available in the Analytics module (see Analytics > Sales > Marketing). These reports reflect the data listed on the Marketing tab.
How to
- Click the Reports
menu icon
 and click the Marketing tab
 - Highlight the Call Back report.
- In the Start Date field, select the beginning date from the calendar (click the down arrow).
- In the End Date field, select the ending date from the calendar (click the down arrow).
- Go to the bottom section of the tab to complete the next few steps.
- In the Filter by Estimator field, select the estimator from the list of names.
- If applicable, select the Estimates Only check box to report call backs for estimates only.
- If desired, click the View Report Packs field (down arrow) to view report pack information; select the check box for Show All Reports if needed.
- To view the report on the screen, click the Print Preview button at the top right of the tab.
- From the report preview, click the print icon
 at the top left to send it to your printer.
 - To send the report directly to your printer, click the Print button at the top right of the tab.
-
If needed, revise the disclaimers and notes on the report by clicking the Edit Disclaimers button at the top right of the tab. A Notes box opens.
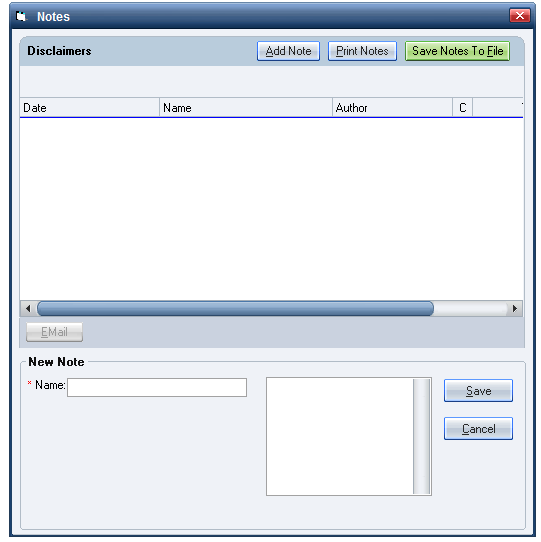
- Click on the relevant note and edit it as needed. Click the Save button at the bottom of the box.
- To add a New Note, enter the Name of the note and the content in the bottom section of the box, then click the Save button.
- Click the Add Note button at the top of the box to add the note to the report.
- Click the Save Notes to File button to save the notes to a separate location; in the Save As window, name the file and select the location to save the file.
- Click the Print Notes button at the top of the box to preview a summary of the notes.
- Click the print icon at the top of the preview to send it to your printer.
Use the View Job Listing feature as a short cut to print reports directly from the Reports menu, without returning to the Whiteboard.
- From the Reports menu, click the Marketing tab.
- Click the View Job Listing field (down arrow) in the bottom section of the tab. A list of all current jobs/repair orders appears.
- Select the desired RO, then click the View Job Listing arrow again to close the list. The repair order will change to the one selected; the report options for the new repair order appear.
- View and print a marketing report for any current RO.
- To view a report on the screen, click the Print Preview button.
- To send the report to your printer, click the Print button.
- See View Job Listing for more details.
Reference
The  symbol indicates that this is a recommended report; information includes how it should be filtered and the purpose of the report.
Call Back Report (#95) – Filter by Estimator Name and Estimates Only. This report is used for calling customers that you could not get a commitment from when they were in the shop. If the estimator is responsible for calling all his/her customers, use this list. If a CSR calls all customers, see Jobs Reports. This report summarizes the outstanding estimates that are in the Opportunities (Estimates & Assignments) > List View that were not converted into repair orders. It is available with the Opportunity Management module, which is included in the RepairCenter Essentials, Professional, and Premiere packages. 