User Defined
The User Defined tab allows you to set guidelines for an unlimited number of items. Each item is associated with a part group, which must match the Description of a repair line in the estimate. If the part group does not match the Description of a repair line, then no items within the group will be checked.
The Part Group names provided are examples, based on those used in Mitchell UltraMate. You may need to change the Part Group names if you use a different estimating system. If the profile is read-only and “Share this item with other Profiles” is not selected, items on this tab are also read-only. Otherwise, items on this tab can be edited as necessary.
This tab includes two Save buttons. These buttons are used to save changes to the Part Group list and Items associated with the groups. These buttons will not save changes to the profile made on other tabs, and clicking the Save button near the bottom of the dialog box will not save items on this tab. You can open another tab and not lose changes. Changes are lost only if you return to the Main menu without clicking the correct Save button.
The Manage Profiles window appears.
|
The Manage Profiles window appears.
|
The Manage Profiles window appears.
The name must exactly match a repair line item in the estimate for the items associated with the group to be checked.
|
![]() To add an item to a part group
To add an item to a part group
The Manage Profiles window appears.
|
![]() To delete an item from a group
To delete an item from a group
|
The Manage Profiles window appears.
|
Part Group Alias Manager
The Alias Manager maintains the list of aliases associated with part groups.
|
The Parts Group Alias Manager window appears.
The Alias List shows the current aliases associated with the group.
|
|
Reference
![]() User Defined Component Descriptions
User Defined Component Descriptions
|
Add Item settings |
||
|
Click Add Item, then use the following components to define the item settings. |
||
|
Description |
The name of the selected item. Type the name in this box when adding a new item or changing the name of an existing item. |
|
|
Dollar Amount |
The dollar amount guideline for the item. |
|
|
Exception Type |
Allows you to select a condition that would trigger an exception. |
|
|
Labor Hours |
The labor hours guideline for the item. |
|
|
Labor Rate |
Select the labor rate for the item from the list of labor rates. |
|
|
Part Group |
Select the part group with which the item is associated from the Part Group list. You can move an item from its current group to another group by selecting the new group from this list. |
|
|
Operation |
Select the operation associated with the item. |
|
|
Share this item with other Profiles |
Allows the item to be shared with other profiles. If the profile is read-only, selecting this option allows the item to be edited. |
|
|
|
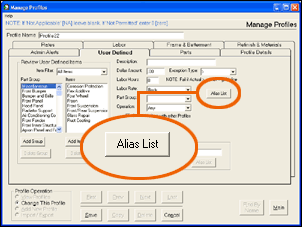
Opens the Part Group Alias Manager. |
|
|
|
Saves changes to the selected item. (Clicking this button does not save the profile.) |
|
|
Review User Defined Items |
||
|
Item Filter |
Select the filter to limit the items shown for each group by Exception Type. |
|
|
Part Group |
Lists the user defined part groups. Each part group must exactly match a repair line in the estimate or its associated items will not be checked. (The Miscellaneous group does not need to match a repair line and cannot be deleted.) |
|
|
Items |
The list of items associated with the selected group. |
|
|
|
Adds a new group to the Parts Group list. |
|
|
|
Removes the selected group from the Part Group list. You must delete all items associated with the group before you can delete the group. |
|
|
|
Adds a new item to the selected part group. |
|
|
|
Deletes the selected item. |
|
|
Add / Edit Group |
||
|
Group Name |
The name of the selected part group. If you are adding a new group, type the name of the new group in this box. You can use this box to change the name of any existing group except Miscellaneous. |
|
|
|
Saves changes to the selected group (but does not save the profile.) |
|
|
|
Opens the Part Group Alias Manager. |
|


![]() Part Group Alias
Manager Component Descriptions
Part Group Alias
Manager Component Descriptions
|
Part Group Alias Manager |
||
|
Part Group Name |
Select the part group from the list. |
|
|
New Alias |
Enter a name for the new alias. |
|
|
Alias List |
Lists the aliases currently associated with the part group. |
|
|
|
Adds a new alias to the selected part group. |
|
|
|
Deletes the selected alias from the part group. |
|
|
|
Closes the Part Group Alias Manager and returns to the User Defined tab. |
|


