Returning Parts
Use the Return Parts tab to record parts that you are returning. Returning a part allows a Parts Return Slip to be printed. There are a variety of reasons for returning a part: ordering an incorrect part, a vendor sending the wrong part/side/color, parts arriving damaged, etc.
Every part that is listed on an invoice needs to be received, even though you may plan on returning the part. Adhering to this rule ensures that all parts are accounted for and the information that posts to Accounting is accurate.
The Return tab is available if you have the Parts module licensed. Refer to Part Settings to determine how your shop has been configured.
How to
Follow these steps to return a part. For additional return options, see Receiving Parts.
- On the Whiteboard, double-click the repair order, click the Parts tab, then click the Return tab.
- Select the parts you want to return. You can select a single part, or select multiple parts (if they were received on the same invoice) by using the Ctrl key, plus clicking.
- In the Return group, select or enter
a Return Reason.
Note: If you are unable to type in a reason, your shop does not have "Require Return Reason when a part is returned" enabled. -
Click Return. For each part you return, a dialog box appears with options for reordering the part.
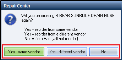
- Select whether you want to reorder the part, and if you want to order it from the same vendor.
- Click Yes - same vendor to automatically reorder the part from the same vendor. A purchase order is generated and the part appears on the Order tab with a status of Ordered. The process to reorder the part is complete.
- Click Yes - different vendor to reorder the part from a different vendor. The part appears on the Order tab with a status of Returned. You still need to order the part from another vendor.
- Click No to return the part without reordering it. The part appears on the Order tab with a status of Returned/Zeroed. The process to return the part is complete.
- The Parts
Return Slip appears. Review it for accuracy then
click the printer icon
 in the upper-left corner of the window to print a copy.
Tip: Print two copies of the return slip: one for the vendor to use to process the credit memo, and one to be signed by the vendor and kept until the credit memo is received.


- On the Whiteboard, double-click the RO, then click the Parts tab; the Order tab is open by default.
- Reorder the wrongly returned line item, as usual.
- Receive the returned line item with the invoice number "Wrong/Ret/Adj," using the current date as the invoice date.
- Select the Credits tab; post the credit memo using "Wrong/Ret/Adj" as the invoice number and the current date as the credit memo date.
- When Accounts Payable sees these two entries, they will mark the lines as being transferred without sending them to Accounting.
Reference
.png)
|
Note: For abbreviated column headings, roll your cursor over the heading to see the full name or description. |
||
|
Field Name |
Editable |
Description |
|
Columns |
|
|
|
Qty |
N |
Quantity of part needed. |
|
Type |
N |
Part type (New, Used, AM, etc.). Prior to ordering/receiving the part, the type can be edited by double-clicking in the column and selecting a different type from the drop-down menu. Once the part has been received, the type cannot be changed. |
|
Description |
N |
Part name, as imported from your estimating system. |
|
Part Number |
N |
Part number, as imported from your estimating system. |
|
Estimate |
N |
Expected list price as imported from your estimating system or as entered on a manually-created RO line. If a line discount has been applied, this amount is shaded yellow. |
|
Vnd List |
N |
List price as provided by the parts vendor. |
|
Cost |
N |
Your cost, as provided by the vendor (the amount is calculated for you, but may be changed if necessary). You can change it by double-clicking and typing in a new amount. |
|
Vendor |
N |
Part supplier. When the part is ordered/received, the vendor cannot be changed. |
|
P% |
N |
The discount for each part that has information in the Vendor and Cost fields. |
|
Status |
N |
Status of the part: Ordered, Not Ordered, Back Ordered, Inventory, Maintain, In, Removed, Hide, and On Hold. The Status can be changed by right-clicking in the column and selecting from the list. It can also be changed by right-clicking and selecting Change Status. For back-ordered or IOU parts, a status of "B" or "I" will display on the Whiteboard under the PS column. |
|
P |
N |
If the part is paid for by Cash On Delivery (COD), select this check box prior to clicking Receive. With this check box selected, the invoice is highlighted in yellow in the Accounting Payables tab. This alerts the person transferring data to Accounts Received that the invoice should not be transferred. |
|
C |
N |
Indicates whether the part is a Critical part or not. If a part is a critical part, that status appears on the purchase order. |
|
I... |
N |
IOU - A part still owed to the customer. Marking a part as IOU enables the ability to print an IOU receipt for the customer. (See We Owe/IOU Parts.) |
|
B |
N |
Indicates that the part has been back-ordered. |
|
PO# |
N |
The purchase order number populates this column when the part is ordered. RepairCenter generates the PO number from the RO number, adding a sequential number (123-1, 123-2, etc.) for each subsequent parts order. Once the order is placed, this number can be changed by right-clicking on the line and selecting Change PO. |
|
Invoice # |
N |
When the part is received, the vendor invoice number appears here. |
|
Orig Invoice # |
|
Original invoice number appears here when you return a part. If the part is re-ordered and re-received, the invoice number for the originally received part is retained in this field. |
|
Orig Cost |
|
Original cost of the part appears here if you have returned a part. |
|
Group |
N |
For CCC One® users only: If parts are selected from a group in the estimating system, that information displays here. |
|
Line |
N |
Line reference number, which also appears on the purchase order. You and your parts vendor may refer to it regarding any parts on a purchase order. |
|
Est Each |
N |
Price for each part; particularly useful when ordering quantities of more than one. This amount is updated if the quantity and/or Vendor List Total is changed. |
|
Bin |
N |
If the shop uses bin numbers, this column indicates the location of the part in the shop. You can change it two ways:
|
|
Ordered On |
N |
Date the part was ordered. |
|
Markup |
N |
Your cost, plus any markup applied to used parts. |
|
S# |
N |
If the part was added to the RO as a result of a supplemental estimate, the supplement number appears here. |
|
DMS Invoice # |
N |
If a Dealership Management System (DMS) interface is installed, this field displays the invoice number that was generated by the DMS. (This column is not visible if a DMS interface is not installed.) |
|
D/M |
N |
If there was a line discount or markup applied in the estimating system, the discount or markup percent shows here. |
|
Buttons, Check Boxes, Fields |
||
|
Print List |
|
Click to print a report showing the entire
parts list. The report displays on the screen; click the printer icon |
|
Add to Scrubber List |
|
Adds the selected part to the scrubber. For detailed instructions, see Scrub parts. |
|
Return Area |
||
|
Vendor / Edit |
N |
The vendor from whom you ordered the highlighted part or parts. To change the vendor, click Edit and select a new vendor. |
|
Discount |
N |
The discount you received from the vendor. |
|
PO # |
N |
The purchase order number. RepairCenter generates the PO number from the RO number, adding a sequential number (123-1, 123-2, etc.) for each subsequent parts order. Once the order has been placed, this number can be changed by right-clicking in the PO# column in the parts list and selecting Change PO. The change will also occur in this PO # field in the Purchase Order area. |
|
Returned |
Y |
Date the parts are to be returned. |
|
Invoice # |
N |
Vendor's invoice number that contained the highlighted part or parts. |
|
Lead Tech |
N |
The lead technician for this repair order. |
|
Return Reason |
Y |
The reason for returning the part or parts; this must be entered before the return process can be completed. |
|
Send to Payables |
Y |
Select or clear this check box, depending upon whether or not payments have already been made. Clearing the check mark indicates the invoice has been pre-paid and will be highlighted in orange in the Accounting Payables tab. This alerts the person transferring data to Accounts Received that the invoice should not be transferred. |
|
Vendor List Total |
N |
The amount as reflected in the Vnd List column. |
|
Invoice Cost |
N |
The amount shown in the Cost column. |
|
Invoice Cost Total |
N |
The total cost of the invoice. |
|
Qty Selected |
N |
Shows how many parts lines you have selected. |
|
Qty Received |
N |
Shows how many parts have been received. |
|
Return |
|
Click to complete the return procedure. The status of returned parts changes to "Returned" or "Returned/Zeroed," depending upon whether you will be re-ordering the part. (See Returning Parts above.) |
|
RO Information |
|
Click to see administrative and vehicle information associated with this RO. |