Creating a Custom Work View
Filters limit the assignments shown in the Integrated Work View.
The filter selections you make remain until you change them, even after closing your browser.
How to
-
On the Work Queue menu, select Tasks.
-
Click the New View tab.
-
Use the available filters to limit the Work View list to only those items you want in your custom view.
- If you cannot see the filter section click
 to the left of the Filter section title.
 -
Enter a View Name and then click Save New View.
You can also customize what columns are shown in the list and in what order they appear.
The view you created appears as a tab between the Default and New View tabs.
-
In the Filters section, click Configure Columns.

- Select a column title in one of the boxes and use the Add or Remove buttons to move the column to the other box.
- Continue adding and removing column titles until the Selected Columns box contains all the columns you want.
-
To change the order of the columns, select a column title and use the up and down arrows to change its place.
The top of the list indicates the leftmost column in the Work View list.
-
Click Save when you are done configuring columns for the work view.
The Configure Columns window appears.
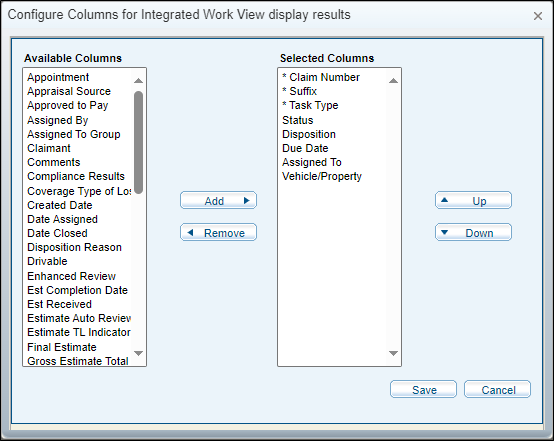
The Selected Columns box indicates the column titles and order currently showing in the Integrated Work View list. The Available Columns box indicates column titles you can add to the Selected Columns box.
Reference
|
Claim |
|
|
Claim Number |
Limits the list to the claims which begin with the information you enter here. You must include at least the first six alphanumeric, hyphen and underscore characters. |
|
Assigned By |
|
|
Anyone |
Includes claims assigned by any user. |
|
Resources |
Narrows the list to only those claims assigned by a specific user. Enter the user's ID or click |
|
Assigned To |
|
|
Anyone |
Includes claims assigned to any user. |
|
Resources |
Narrows the list to only those claims assigned to a specific user. Enter the user's ID or click |
|
Groups |
Limits the list to claims assigned to a group. Enter the group's ID or click |
|
Unassigned |
Limits the list to claims that are not assigned. |
|
View Name |
|
|
View Name |
Displays the name of the view. If you are creating a new view, you can to enter the view name here. |
|
Make this my initial view |
Select this check box to make this view the default. |
|
Task Details |
|
|
All Open Tasks |
Includes all open tasks. |
|
Selected Tasks |
Allows you to view a combination of tasks and their dispositions (statuses). Click |
|
Task Date |
|
|
Today |
Includes only assignments for the current day. |
|
Date Range |
Limits the list to those assignments created with a certain date range. You can select a predefined date range from the list or select Other to enter your own date range. |
|
Exact Date |
Enter the date (MMDDYY format), or click |
|
|
Click to save a new view. |
|
|
Click to save an existing view. |
|
|
Click to remove a view. |
|
|
Opens the Configure Columns window. |
|
|
Resets to the default filter settings, removing any settings you have made. |


