Generate and View Predictive ADAS Reports
Use ADAS (Advance Driver Assistance Systems) Report to quickly find ADAS controllers to aid in your repair planning, and learn what calibrations may be needed post repair. The ADAS Report includes operational details like the necessary calibrations needed related to the estimate lines you added to the estimate. It also includes the ADAS modules that the vehicle is potentially equipped with. ADAS information is provided in partnership with ProTech.
Note: This feature is not available to all users and requires additional licensing.
How to
Start the Predictive ADAS Report by writing an estimate after a Diagnostics scan is added.
Note: Mitchell Cloud Repair users must convert the Job/Opportunity to a Repair Order before generating a request for the ADAS Report.
-
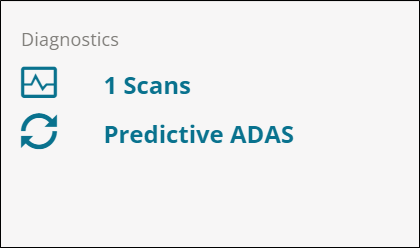
On the Job Overview, add a Diagnostics scan.
-
On the Job Overview page, select Write Estimate.
-
Write and commit the estimate.
-
On the Job Overview page, the Diagnostics card shows the ADAS Report is in progress. Information is automatically sent to ProTech for processing.
-
The card notifies you when the process is complete.
Note: If the estimate is updated by adding or removing qualifying repair lines, a new request is automatically sent to ProTech for processing and an updated report is created.
-
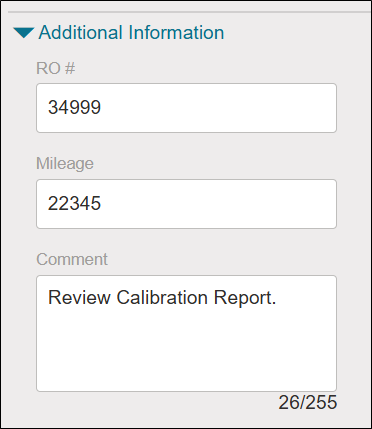
After the report is complete, you have the option to add additional information like mileage, comments, and repair order number.
Start a ADAS report for a job with an existing estimate by adding a Diagnostic Scan.
-
On the Job Overview, add a Diagnostics scan to a job with an existing estimate.
-
On the Job Overview page, the Diagnostics card shows the ADAS Report is in progress. Information is automatically sent to ProTech for processing.
-
The card notifies you when the process is complete.
View a list of ADAS components available on a selected vehicle.
-
On the Job Overview page, select Predictive ADAS on the Diagnostics card.
-
The Predictive ADAS Report appears on the ADAS tab on the Diagnostics Report page. View the ADAS Summary Report.
-
Review the recommended calibration operations. Some operation lines include icons to related repair procedures. Click the hyperlink or icon to open the related AllData Repair procedure.
Note: This feature requires an active AllData subscription for full access to repair procedures. The hyperlinks are provided by Protech and link directly to the appropriate documentation based on the vehicle make, model, year, and specific calibration operation.
-
Select Print to print the report or click Download to download a PDF copy.
Add more information to your Predictive ADAS reports with three input fields:
-
Mileage: Add the vehicle's current mileage
-
RO#: Enter the repair order number
-
Comments: Include relevant notes or observations
Find these input fields in the right panel when creating reports. After you select Save, the information is saved to the report. If you need to make changes in the future, open the report again and modify the desired fields.
Note: This feature requires Predictive ADAS access at the shop level.
-
On the Job Overview page, select Predictive ADAS on the Diagnostics card.
-
If not already selected, select the ADAS tab on the Diagnostics Report page.
-
In the right panel, enter content for any of the following fields:
- Mileage: Add the vehicle's current mileage
-
RO#: Enter the repair order number
-
Comments: Include relevant notes or observations
-
Select Save.
-
On the Job Overview page, select the Diagnostics card.
-
On the Diagnostics Reports page, select the Predictive ADAS tab. The ADAS summary reports appears.

-
Do any of the following:
-
Select Download. The scan PDF appears in your download folder.
-
Select Print. Follow the prompts to print or download your scan.
Send ADAS Reports to insurance company partners from Mitchell Diagnostics.
-
On the Job Overview page, select the Diagnostics card.
-
On the Diagnostics Reports page, select the Predictive ADAS tab.
-
Click the Add to Insurance Upload check box, and then click Save.
-
Click Send on the Job Overview page when you are ready to send all of your attachments and estimates on the job to the insurance company.
-
On the Job Overview page, select the Diagnostics card.
-
On the Diagnostics Reports page, select the ADAS Report tab. The ADAS summary reports appears.
-
On the Scan Summary page, select View Invoice.
-
In the Add Information window, select an invoice Profile in the Invoice Profile list.
Note: Invoice Profiles are configured on the Settings page. You can set up templates that includes line items for flat and hourly rates.
-
Enter an invoice number in the Invoice# box (optional).
-
Select the calendar icon to modify the date (optional).
-
Select View Invoice.
-
Click Print to print the report or click Download to download a PDF copy.
Send Predictive ADAS reports to insurance companies directly from Mitchell Connect. This feature is available for assignment jobs and requires a valid VIN and estimate. The option to send reports is controlled by custom settings and can be adjusted per job.
This feature allows:
-
Seamless integration of Predictive ADAS reports into insurance claims workflow.
-
Improved communication between repair shops and insurance carriers.
-
Time-saving automation of report sharing.
-
Enhanced transparency in the claims process.
-
Ensure valid VIN and estimate information is present on the job.
-
On the Job Overview page, select ADAS Report on the Diagnostics card.
-
Select the ADAS Report tab if not already selected.
-
On the Diagnostics Report page, select the Add to Insurance Upload check box, and then select Save.
-
Select Job Overview to return to the Job Overview page.
-
On the Job Overview page, select Send.
-
The ADAS report is listed in the Items to Send window. Select Send. The Delivery Status on the ADAS Report tab on the Diagnostics page now shows: Sent to Insurance.