Repair QA
Use Repair QA to help ensure proper and safe repair. Repair QA saves research time by providing targeted repair procedure access based on your estimate. You can also keep track of repair progress with technician confirmation of each completed repair line. In addition, Repair QA allows you to report on repair procedure usage and completed work by technician.
Tip: When available, take advantage of the repair procedures directly from the manufacturer.
How to
- Add an estimate line in Mitchell Cloud Estimating.
Note: You do not need to enter labor lines to access Repair Management documents. Only estimate lines are required.
- On the Job Overview page, click the Repair Plan card. The Repair Plan page appears.
- If not already selected, select the Repair QA tab.
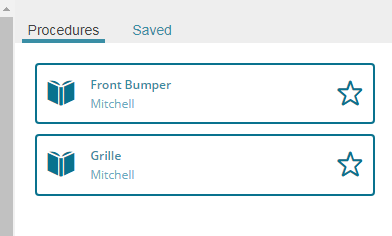
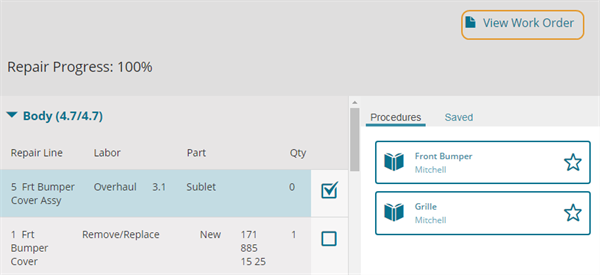
- Repair lines appear on the left of the page. Repair procedures appear on the right. Click the repair procedure under the Procedures tab. The related repair procedure appears.
Tip: If you are using Mitchell Cloud Estimating, you can view OEM procedures as you are writing the estimate (see Add OEM-recommended Repair Lines).
- Review the procedure. Click Repair Plan to return to the Repair Plan page.
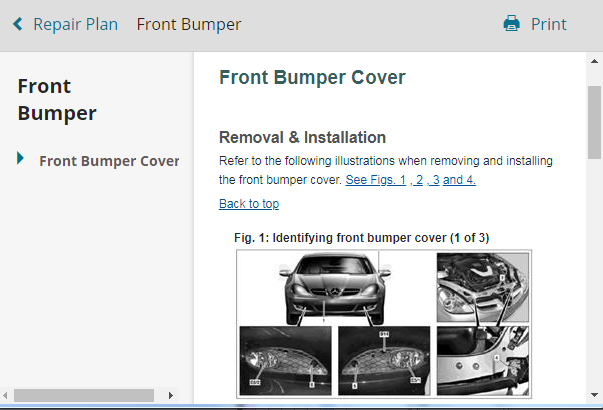
Tip: Click Print to print a copy of the repair procedure.
- Click Job Overview to return to the Job Overview page.
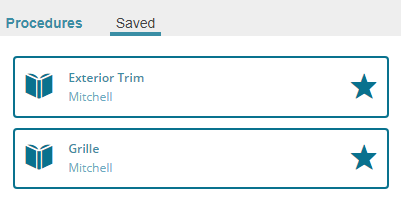
You can save repair procedures on an individual job for later review.
- On the Job Overview page, click the Repair Plan card. The Repair Plan page appears.
- If not already selected, select the Repair QA tab.
- Click the star next to the procedure you want to save.
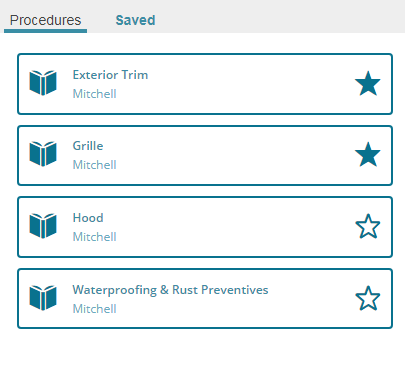
- Click the Saved tab on the Repair Plan page to review saved repair procedures.
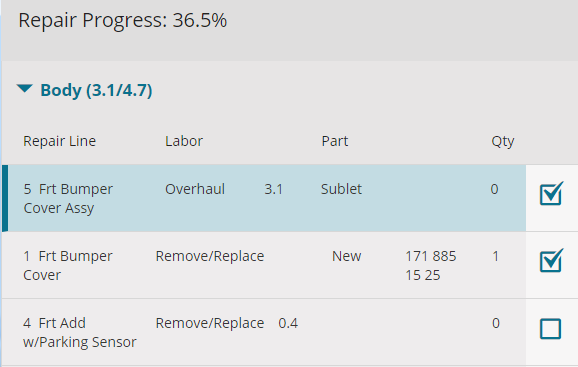
After you review the procedures, update your repair progress when you complete repairs for each repair line.
- On the Job Overview page, click the Repair Plan card. The Repair Plan page appears.
- If not already selected, select the Repair QA tab.
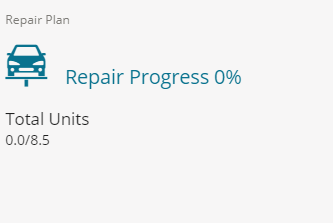
- Click the check box next to the completed repair line. The Repair Progress percentage increases as you select completed lines. You can also click Complete All in each category to check all check boxes by category.
Tip: Click View Work Order on the Repair Plan page at any time to review, download, or print the full Work Order.
- Click Job Overview to return to the Job Overview page.
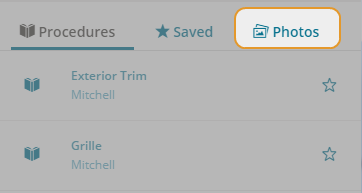
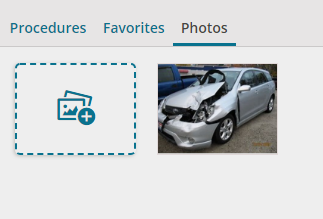
Document your completed work with photos of the repair.
- On the Job Overview page, click the Repair Plan card.
- If not already selected, select the Repair QA tab.
- Click Photos.
- Click the File Input button
 to browse for photos.
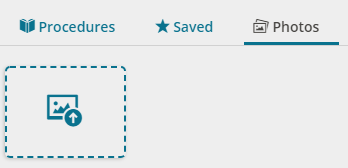
Tip: Mobile users have the option to take a photo and upload at the same time. From your mobile device, tap and then tap Take a Photo or Video.
- On the Job Overview page, click the Repair Plan card.
- If not already selected, select the Repair QA tab.
- Click Photos.
- Click the image you want to delete.
- Click Delete Attachment, and then click Done.
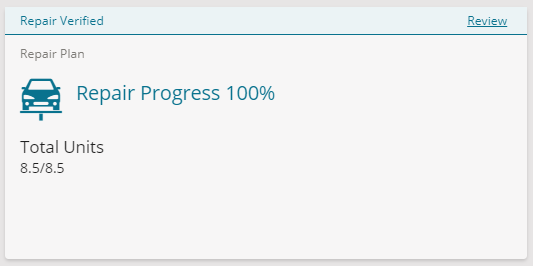
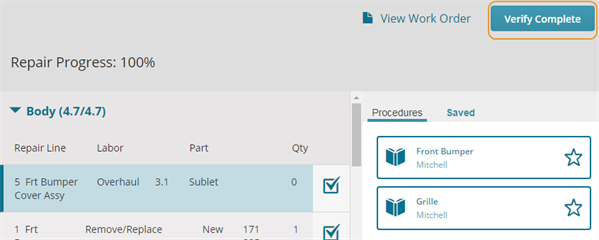
Repair facility managers can verify completed work after all repair lines are checked. The Repair Progress Card shows Repair Progress at 100% when all repair lines are completed and confirmed.
Note: Only Shop Managers can Verify Completed Repair Procedures. Approve Repair and Repair Plan must be selected in your permissions (Settings > User Accounts > [Select a User] > Permissions).
- On the Job Overview page, click the Repair Plan card. The Repair Plan page appears.
- If not already selected, select the Repair QA tab.
- Verify all repair procedures were completed properly and safely by your staff, and then click Verify Complete.
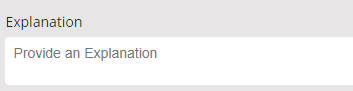
- If you or your repair facility were prevented from following repair standards, click Add Explanation and provide a description in the text box.
- Click Confirm.
Important: By selecting Confirm you affirm that all repairs were made using repair procedures to the best of your shop's capabilities.
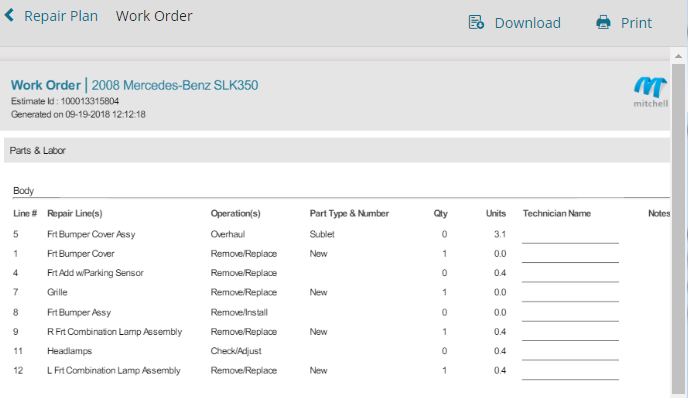
Print or Download the Full Work Order as a PDF at any time from the Repair Plan page. Use the page for notes or to document the names of the technicians.
- On the Job Overview page, click the Repair Plan card. The Repair Plan page appears.
- If not already selected, select the Repair QA tab.
- Click View Work Order at the top of the page.
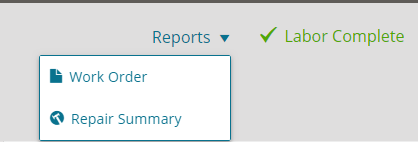
Note: You can print or download work orders for completed repair plans. On the Repair Plan page, click Reports, and then click Work Order.
- Do one of the following:
- Click Download and follow the prompts to download the Work Order as a PDF.
- Click Print and follow the prompts to print the Work Order.
You can print documents from a completed repair plan, including Repair Order, Work Order, Final Bill, or Repair Summary.
- On the Job Overview page, select the Repair Plan card.
-
If not already selected, select the Repair QA tab.
- On the Repair Plan page of a completed repair plan, select Documents.
- Select one of the following:
- Repair Order: Review, print or download the repair order.
- Work Order: Review, print or download the full work order.
- Final Bill: Review, print, or download the final bill.
- Repair Summary: View a summary of the repair. Includes names of the technicians, labor units, and accessed procedures.
If your workflow with your insurance company partner and collision repair network allows you to use estimating software other than Mitchell Cloud Estimating, follow the steps below to apply to Repair QA.
-
Complete the estimate in your third part application.
-
From an Opportunity, click Add Existing Estimate from the Job Overview page. Follow the prompts to load your estimate to the Opportunity.
-
Convert the Opportunity to a Repair Order.
-
On the Job Overview page, click the Repair Plan card.
- If not already selected, select the Repair QA tab.
-
Complete the Repair QA procedures.