Custom Forms
Use Custom Forms to create customer correspondence such as thank you and follow up letters, as well as insurance-related documents like work authorizations. You can create your own forms and merge company information and job information into your reports, eliminating the need for manual form entry.
We recommend creating Custom Forms for your standard shop work authorization form and vehicle delivery checklist.
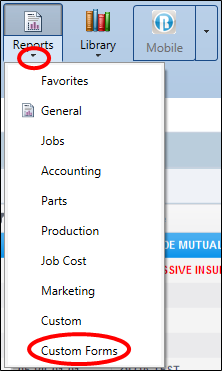
Once created, all custom forms can be accessed from the Reports > Custom tab (see Print Custom Forms).
Follow the steps below to create a Custom Form:
How to
- On the Custom Forms toolbar, click down arrow on the Reports menu icon.
- Click Custom.
- Select the form you want to view and print.
- Click Print Preview to view the form.
- Click Print to print the form.
- On the Custom Forms toolbar, click down arrow on the Reports menu icon.
- Click Custom Forms.
- Add content to your form and format the content using the Custom Form toolbar.
Add Report Properties to include your company logo, company address, and more.
- Start a Custom Form.
- Select the desired properties in Report Properties Include list. See the table below for details.

Property
Description
Company Name Your company name as it appears in Configuration > Shop Setup > Shop Information. Company Logo Your company logo if it has been set up in Configuration > Shop Setup > File Directories > Miscellaneous. Company Address Your company address as it appears in Configuration > Shop Setup > File Directories > Miscellaneous Information. Customer Info - Detail The customer's detailed information, including detailed vehicle and insurance information. Customer Info - Summary The customer's information consists only of the customer's name and vehicle. RO Number The RO number appears under the form name, in the upper right corner. Estimator Name If an estimator's name is part of the RO, it will appear on the form if this check box is selected. In/Out Dates The Due In and Due Out dates are included on the form. Set this Report as a Disclaimer This option will save the custom form as a disclaimer. No Header If this option is selected, only the form name is printed in the upper right corner. No other information, even if selected as part of the properties, prints.
Tip: If you have a logo set up to print on reports, you must select the Company Name from this list in order for it to show on your report (see Configuration > Shop Setup > File Directories > Miscellaneous).
Add merge fields to your custom forms to automatically include information about the customer and your shop. RepairCenter replaces the merge field with information from the selected job.
- Start a Custom Form.
- Place your cursor where you want to insert the merge field.
- On the Custom Forms toolbar, click
 and then select a merge field.
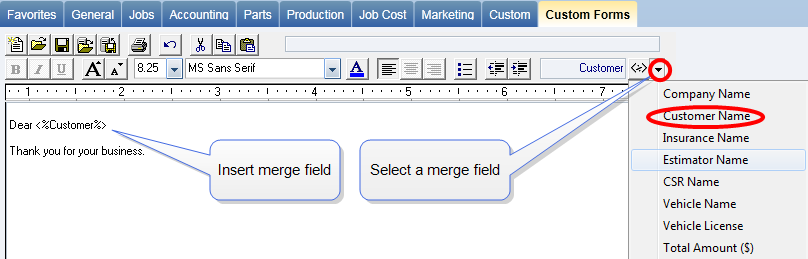
Save Custom Forms to a selected file folder or to the database. Save forms to the database selection if you want to share your form with all workstations in your shop. Completed forms appear in a list under the Custom tab.
Note: The file name for the form prints on the header of the form. You may want to use a number system or a single alpha character.
Save Custom Form to the database
- Click
 . The Save as dialog box appears.
 - Enter a file name in the File name field.
- Click Save.
Save Custom Form to a file folder
- Click
 . The Save as dialog box appears.
 - Enter a file name in the File name field.
- Navigate to the desired directory.
- Click Save.
Delete Custom Form saved to the database
- On the Custom form
tab, click
 . The Open Report dialog box appears.
 - Select the Custom Form from the list.
- Click Delete.
- Click Yes to confirm.
- Click Cancel to close the Open Report dialog box.
Delete Custom Form saved to a file folder
- From Windows Explorer, navigate to the file directory where the custom form was saved.
- Select the custom form from the file list.
- Right click the form, and then click Delete.
Note: Some operating systems may vary.
Reuse existing content for your Custom Forms by importing a text file.
- Start a Custom Form.
- On the toolbar, click
 .
. - Browse to the desired document and click Open. Your text displays in the new form.
- Edit the form and save as needed.
Reference
Use the Custom Reports toolbar to format your content.

| Button | Description |
 | New Communique. Create a new form.
|
| Load new form from a previously-created file. |
| Saves the form as an RTF file in the folder you select, and saves the form in the Custom tab in Reports. |
| Open a form from the list of Custom Forms you previously created and saved to the database. |
| Save to database. This is the recommended way to save a custom form. Saves the form as an RTF file in the folder you select, as well as saving it in the database. This makes the form accessible from all workstations. It also saves the form in the Custom tab in Reports. |
| Print preview the Custom Form on your screen. |
 | Undo you last action. You can click this multiple times to undo multiple changes. |
 | Cut highlighted text. Text is saved to your Clipboard and can be pasted elsewhere. |
 | Paste content from the clip to another location on the form. |
 | Bold highlighted text. |
 | Italicize highlighted text. |
 | Underline highlighted text. |
 | Increase highlighted text by one point in size. |
 | Reduce highlighted text by one point in size. |
 | Select the font size. |
 | Select the font type. |
 | Change the font color of highlighted text. |
 | Left align text. |
 | Center align text. |
 | Right align text. |
 | Add a bulleted list. |
 | Left indent text. |
 | Right indent text. |
| Add merge fields (see Add Merge fields). |

