Send Attachments to Mitchell Connect
Some users have the option to share photos and attachments with insurance companies using Mitchell Connect. You can manage your photos and attachments in RepairCenter and, when ready, send the attachments to Mitchell Connect. To use this feature, configure your Insurance Company settings and make sure jobs in both RepairCenter and Mitchell Connect use the same claim number.
Note: This feature is currently only available to select shops in Canada with Manitoba Public Insurance or ICBC as their insurance company partner.
- In RepairCenter, click More.
- Click Business Lists.
- Click the Contacts tab.
- Click the Insurance tab.
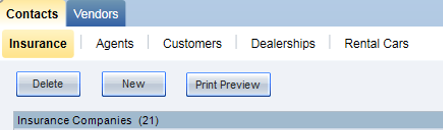
- Click the insurance company name in the list.
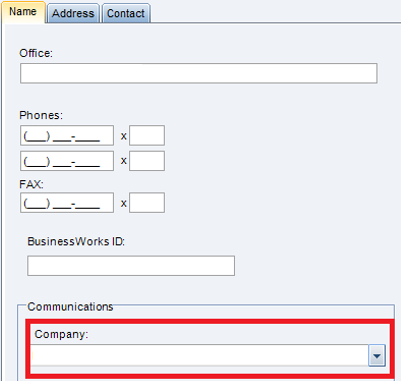
- Review the Communications box on the Name tab. Ensure the Company field includes the company code for the insurance company.
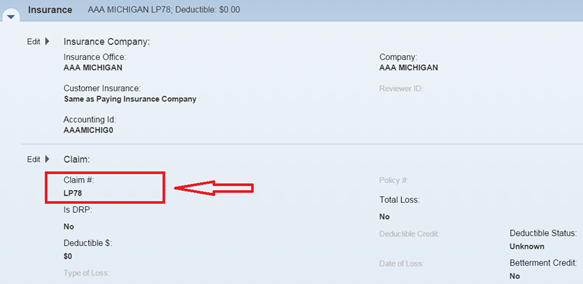
Ensure the claim numbers in RepairCenter and Mitchell Connect are the same.
- In Mitchell Connect, review the claim number on the Insurance Card on the Job Overview page.
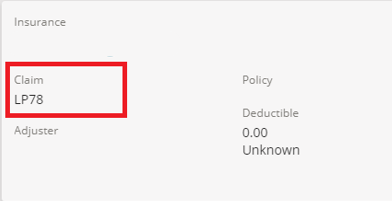
- In RepairCenter, open the RO Admin page and review the claim number.
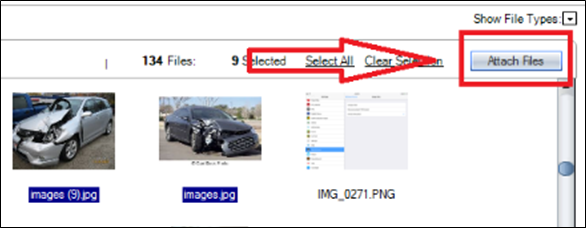
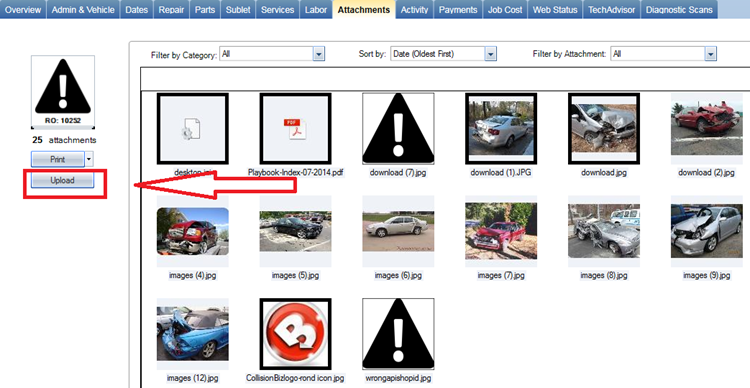
- Add your attachments to RepairCenter. In RepairCenter, click the Attachments tab on the Opportunity or RO, and then click Attach Files.
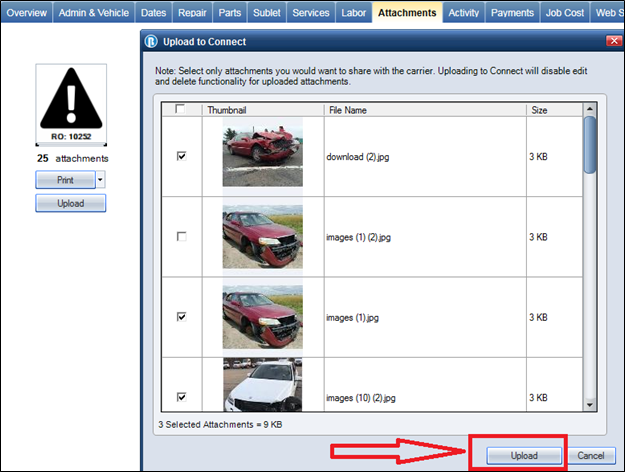
- In RepairCenter, click Upload. The Upload to Connect window appears.
- Select the check box next to the attachments you want to share or click the check box at the top of the table to select all attachments.
- In the Upload to Connect window, click Upload.
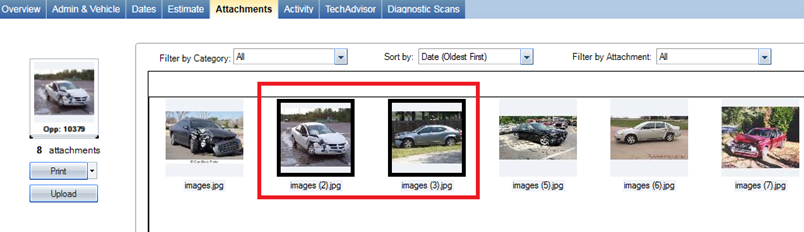
- Attachments uploaded to Mitchell Connect appear with a black border on the Attachments tab in RepairCenter.
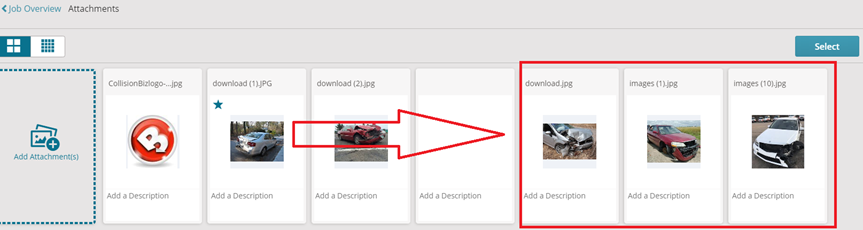
- Attachments uploaded from RepairCenter appear in Mitchell Connect. Click the Attachments card on the Job Overview page to view your attachments.
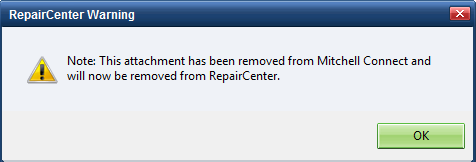
You can delete an image from Mitchell Connect before sending it to the insurance company. Images deleted in Mitchell Connect are also deleted in RepairCenter, and are flagged using an icon in RepairCenter.
- In Mitchell Connect, click the Attachments card, and then click Select.
- Select the images you want to delete, and then click Delete.
- Click Delete at the prompt.
- In RepairCenter, open the Attachments tab and click any attachments that appear with the following icon:

- Click OK at the prompt. The attachment is removed from RepairCenter.